How to Make a Gimkit: A Step-by-Step Guide to Create Your Own Game
Have you ever wanted to turn your school study session into a high-stakes video game? Well, you can do exactly that when you make a gimkit! Gimkit is a super fun learning tool created by a high school student. Unlike boring flashcards, this platform lets you earn “money” to buy power-ups and upgrades. It feels like playing a professional game, but you are actually learning new things at the same time. Teachers and students all over the world love it because it makes the classroom feel like an arcade.
Learning how to make a gimkit is very easy and only takes a few minutes of your time. You don’t need to be a computer expert or a pro gamer to get started. All you need is a topic you want to learn about and a little bit of creativity. In this guide, I will walk you through every single step. We will cover everything from creating your first “Kit” to finding out how to make a gimkit code so your friends can join the fun. Let’s dive into the world of Gimkit and start building something awesome!
The Creator’s Profile: Meet the Minds Behind the Magic
Before we get into the “how-to” part, let’s look at some cool facts about the platform. It’s always nice to know who made the tools we use for school!
| Feature | Details |
| Original Creator | Josh Feinsilber |
| Release Year | 2017 |
| Platform Purpose | Gamified Classroom Learning |
| Primary Goal | Engaging Students through Competition |
| Fun Fact | It was built as a high school project! |
Step 1: Setting Up Your Free Account
The first thing you need to do to make a gimkit is visit their official website. You can sign up using an email address or a Google account. It is usually best to use your school Google account if your teacher uses it too. Once you log in, you will see a clean dashboard that shows all your projects. This is your home base where all your games live.
When you make a gimkit game, the website will ask if you are a teacher or a student. Make sure you pick the right one! If you are a student, you might need a join code from your teacher first. If you are a teacher, you have the power to create “Kits” from scratch. The dashboard is very friendly and uses bright colors to help you find your way around easily.
Step 2: Starting Your First Kit From Scratch
Now that you are logged in, look for the big button that says “New Kit.” Clicking this is the start of your journey to make a gimkit. You will give your Kit a name, pick a language, and choose a fun cover photo. Picking a cool photo makes your game look professional and exciting for other players. I always like to pick a picture that matches the topic I am teaching.
When you make a gimkit, you have a few ways to add questions. You can type them in one by one, or you can import them from a spreadsheet. If you are in a hurry, you can even use a tool called “KitCollab.” This lets your students help you build the game by submitting their own questions. This is a great way to make everyone feel involved in the lesson.
Step 3: Crafting Great Questions and Answers
A game is only as good as its questions! To make a gimkit game that people enjoy, you need to write clear questions. Make sure your answers are not too tricky, but not too easy either. You can add four multiple-choice options for each question. Only one of them should be the correct answer, while the others act as “distractors” to keep players on their toes.
I find that adding photos to your questions makes the game even better. When you make a gimkit, you can upload images to help visual learners. For example, if you are making a science quiz about plants, show a picture of a leaf! This keeps the energy high and helps students remember the facts better. Try to keep your questions short so the game moves quickly and stays exciting.
Step 4: Using the Question Bank for Speed
If you don’t want to write every question yourself, don’t worry! You can still make a gimkit very quickly using the Question Bank. This tool lets you search for topics that other people have already created. If you are teaching about fractions, just search “fractions” and you will see thousands of ready-made questions. You can pick the ones you like and add them to your Kit instantly.
This is a huge time-saver when you make a gimkit game. It ensures that your facts are accurate because you can see what other experts have written. I always recommend double-checking the answers, though, just to be sure they fit your specific lesson plan. Using the Question Bank is the “secret weapon” for busy teachers who want to provide a fun experience without spending hours on prep work.
Step 5: Customizing Your Game Modes
One of the coolest parts about when you make a gimkit is choosing the game mode. Gimkit isn’t just one game; it has many different ways to play! You can choose “Classic” mode where everyone competes for the most money. Or, you can try “Trust No One,” which is like a mystery game. There is even a mode called “Phys-Ed” where students have to move around to play.
When you make a gimkit game, the mode you choose changes how students interact. Some modes focus on teamwork, while others are every student for themselves. Changing the game mode every week keeps the class from getting bored. My personal favorite is “The Floor is Lava,” because it makes everyone work together to survive. It’s a great way to build a strong community in your classroom.
Step 6: How to Make a Gimkit Public for Everyone
Once your Kit is finished, you might want to share it with the whole world. Knowing how to make a gimkit public is important if you want other teachers to find your work. By default, some kits might be set to private. You can go into the settings of your Kit and change the visibility. Making it public helps the entire Gimkit community grow by sharing high-quality learning materials.
When you how to make a gimkit public, your Kit will show up in the search results when other people look for that topic. This is a great way to show off your hard work! Plus, it allows you to easily find your own game even if you aren’t logged into your main computer. Sharing is caring in the world of education, and making your Kit public is the best way to give back.
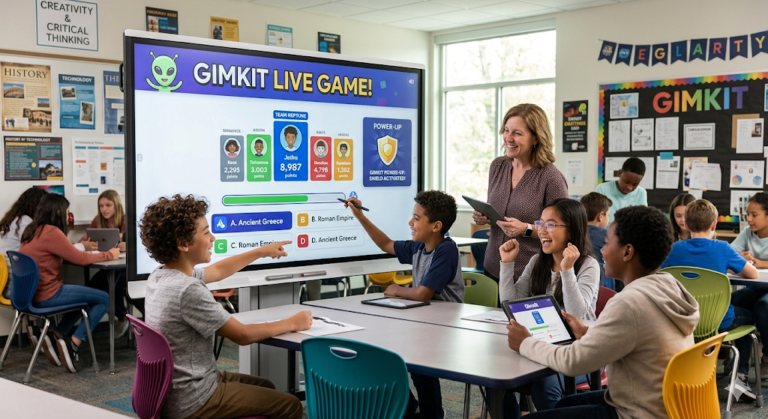
Step 7: Hosting Your Live Game Session
You have built the game, and now it is time to play! To start, click the “Play” button on your Kit. This will take you to a screen where you can select your options, like how long the game lasts or how much money players start with. When you make a gimkit, you are the boss of the game rules. You can even turn off certain power-ups if they get too crazy.
After you hit “Continue,” the game will generate a join screen. This is the moment where you learn how to make a gimkit code. The code is a unique set of numbers that appears on your screen in big, bold text. Tell your students to go to the Gimkit website and enter those numbers. Watching the lobby fill up with student names is always the most exciting part of the process!
Step 8: Understanding How to Make a Gimkit Code Work
The join code is like a key to a secret club. If you are wondering how to make a gimkit code, you actually don’t have to “make” it yourself—the computer does it for you! Every time you start a new live session, a brand-new code is created. This ensures that only the people you want in the game can join. It keeps your classroom safe and organized.
If a student joins late, don’t worry. The code usually stays in the corner of the screen throughout the game. This way, if someone’s internet drops, they can use the how to make a gimkit code instructions to jump right back in. It is a very smart system that makes sure no one gets left out of the fun. Just make sure your screen is visible so everyone can see the numbers clearly.
Step 9: Managing the Shop and Power-Ups
The “Shop” is what makes Gimkit different from other quiz tools. When you make a gimkit, you are giving students a chance to manage their “money.” They can spend their earnings on “Bait” to get more money per question or “Insurance” so they don’t lose money when they get an answer wrong. It teaches them about strategy and making smart choices.
As the creator, you can see how students are using the shop. When you make a gimkit game, you can talk to the class about which upgrades are the most helpful. This adds a layer of math and logic to the game that isn’t found in a normal quiz. Students love the feeling of getting “rich” in the game, and it keeps them focused on answering as many questions correctly as possible.
Step 10: Ending the Game and Reviewing Data
When the timer hits zero, the game ends and a podium appears! It shows the top three winners who earned the most money. Even though the competition is fun, the best part of when you make a gimkit is the data you get at the end. You can see a full report of which questions were easy and which ones were too hard for the class.
This report helps you know what to teach next. If you make a gimkit game and everyone misses the same question, you know you need to explain that topic again tomorrow. It is a very powerful way to check if your students actually understand the material. You can save these reports or even send them to parents to show how much progress the students are making.
Conclusion: Start Your Gimkit Journey Today
Creating your own educational games is a fantastic way to bring energy into any room. Now that you know how to make a gimkit, you have the power to turn any boring lesson into an epic adventure. From picking your topic to learning how to make a gimkit code, the process is designed to be fun for both you and your students. It’s all about making learning feel like play.
I encourage you to go try it right now! Don’t be afraid to experiment with different game modes or use the Question Bank to save time. The more you make a gimkit game, the better you will get at it. Your students will thank you for making school more exciting. So, grab your laptop, pick a topic, and get ready to host the best game your classroom has ever seen!
Frequently Asked Questions (FAQs)
1. Is it free to make a gimkit?
Yes! You can make a gimkit for free. There is a free version called “Gimkit Basic” that lets you create and play games with your class. There is also a paid version with more features, but the free one is great for getting started.
2. How do you make a gimkit game public later?
If you forgot to do it at the start, just go to your “Kits” dashboard. Click on the three dots next to your game and look for “Settings.” From there, you can see how to make a gimkit public by toggling the privacy switch.
3. Can students make their own games?
Absolutely! Students can make a gimkit just like teachers do. It is a wonderful way for them to study for tests or teach their classmates about a hobby they love.
4. What should I do if my gimkit code isn’t working?
If you are struggling with how to make a gimkit code work, make sure you are looking at the “Live” game screen. Sometimes if your internet is slow, the code might take a second to appear. Refreshing the page usually fixes the problem!
5. How many questions should I put in my game?
When you make a gimkit game, I recommend having at least 20 to 30 questions. Since students answer questions multiple times to earn money, having more questions prevents the game from feeling repetitive.
6. Can I use Gimkit for remote learning?
Yes! Since you give students a code to join, they can play from anywhere in the world. You can share your screen on a video call so they can see the leaderboard while they play from their own homes.