How to Make a Gimkit in 2026: Easy Step-by-Step Guide for Teachers
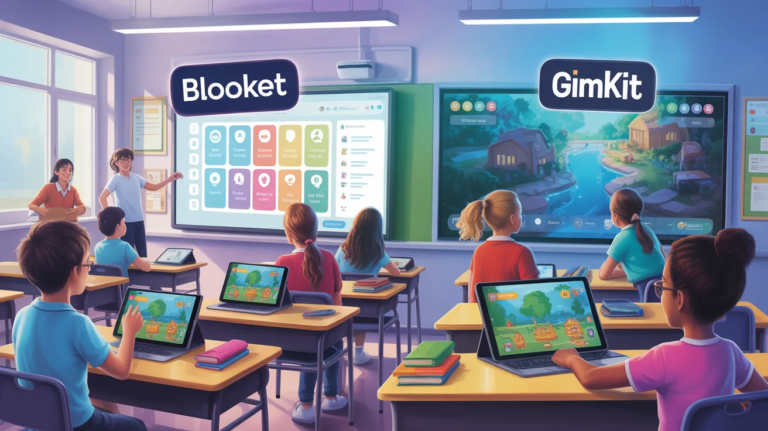
Gimkit is a fun classroom game that feels like a real video game. It was actually created by a high school student! Unlike other quiz tools, students earn “in-game money” by answering questions correctly. They can use this digital cash to buy power-ups, themes, and upgrades in the gimkit shop. This makes learning feel like a competition that everyone wants to win. Many teachers find that it keeps students much more engaged than a standard paper test. It is a great way to turn a boring lesson into an exciting gimkit live event that the whole class will love.
When you play gimkit, you are not just memorizing facts. You are using strategy to decide when to spend your money and when to save it. This adds a layer of depth that other platforms lack. Whether you are using it for math, science, or history, the platform makes it easy to review any subject. It is designed to be fast-paced and high-energy. If you want to transform your classroom environment, learning how to make a gimkit is the first step toward becoming a favorite teacher.
Getting Started with Your Gimkit Sign Up
Before you can build anything, you need to create an account. The gimkit sign up process is very straightforward and only takes a minute. You can use your Google account or an email address to get started. Once you are in, you will see the gimkit dashboard, which is your home base for everything you create. This area is very clean and easy to navigate, even if you are not great with technology. You can see your previous kits, reports from past games, and a button to start a new project.
After your account is ready, you will spend most of your time on the gimkit home screen. This is where you manage your library of games. It is important to keep your dashboard organized so you can find your kits quickly during a busy school day. Most teachers prefer the “Pro” version, but the free version still allows you to make gimkit sets that are fully functional. Taking a moment to explore the settings in your profile will help you customize the experience for your specific students’ needs and grade levels.
Step-by-Step: How to Make a Gimkit Kit
Learning how to make a gimkit is easier than you might think. First, click the “New Kit” button on your dashboard. You will need to give your kit a name and select a language and subject. Next, you can choose a cover photo to make it look professional. Now comes the main part: adding questions. You can type them in manually, or you can import them from a CSV file or even a Quizlet set. This “import” feature is a huge time-saver for busy educators who already have materials ready.
When you gimkit create a new set, try to use a mix of multiple-choice and text-entry questions. This keeps the game challenging but fair. You should aim for at least 20 questions to ensure the game doesn’t repeat too quickly. As you add more content, the gimkit platform saves your progress automatically. This means you don’t have to worry about losing your hard work if your browser crashes. Once you have added all your facts and answers, just hit the finish button to save your masterpiece to your library.
Essential Details for Your First Kit
| Feature | Description |
| Creator | Josh Feinsilber (Original Founder) |
| Platform Type | Educational Technology / Game-Based Learning |
| Main Use | Classroom Review and Formative Assessment |
| Key Currency | Virtual “In-Game Cash” for Power-ups |
| Device Support | Web Browser, Mobile, Tablet |
| Integration | Google Classroom, Quizlet Import |
Navigating the Gimkit Dashboard Efficiently
The gimkit dashboard is designed to help you stay organized without any stress. On the left side, you will find folders where you can group your games by class period or subject. This is very helpful if you teach multiple topics like history and English. You can also find a “News” section that tells you about new game modes. Gimkit often releases limited-time modes like “Trust No One” or “Snowman Survival.” These special modes keep the students coming back for more because the gameplay stays fresh and exciting.
Understanding your dashboard also means knowing how to view reports. After a gimkit host game session ends, you can see exactly which questions your students struggled with. This data is perfect for figuring out what you need to teach again the next day. You can see individual student accuracy and overall class performance. Instead of grading papers for hours, the dashboard gives you all the information in a clean table. It makes your job as an expert educator much easier and more data-driven.
How to Perform a Proper Gimkit Login
To access your saved kits, you must perform a gimkit login using the credentials you created. Sometimes, users get confused between the teacher login and the student entry point. As a creator, make sure you are on the main site and not the “join” subpage. If you forget your password, the site has a very fast reset tool that sends a link to your email. Keeping your login info safe is important so that your custom-made kits stay secure and ready for your next big lesson.
If you are using a school computer, it is a good idea to stay logged in to your gimkit home page. This saves time when the bell rings and students are ready to play. However, if you are on a shared device, always remember to log out. The platform is very mobile-friendly, so you can even log in from your phone to check a kit while you are on the go. Once you are logged in, you have full control over your library and can edit any question at a moment’s notice.
Hosting Your First Game: A Teacher’s Guide
Once your kit is ready, it is time to gimkit host a session for your class. Simply select the kit you want to use and click the “Play” button. You will then be asked to choose a game mode. For beginners, the “Classic” mode is the best choice because it focuses on the core mechanics of earning money. You can set a time limit, like 10 or 15 minutes, or a goal for how much money the class should earn together. This flexibility is what makes the platform so useful for different schedules.
After you click “Continue,” your screen will display the gimkit code. This is a unique set of numbers that your students need to enter the game. As the gimkit host, you will see the names of your students appear on the screen as they join. It is a good idea to tell your students to use their real names so you can track their progress in the final report. Once everyone is in the lobby, just hit the “Start” button and watch the excitement begin as the music kicks in.
Helping Students with Gimkit Join and Codes
Students do not need an account to play; they just need to know how to gimkit join a session. You should direct them to the gimkit/join website. Once they are there, they will see a box asking for the game code. After they type in the gimkit join code you provided, they can enter their name and choose a character. This process is designed to be very fast so that you don’t waste valuable class time waiting for everyone to get connected.
Sometimes a student might lose their connection during the middle of a game. If that happens, they can just go back to join gimkit and enter the same code again. They will usually be able to jump right back into the action without losing their progress. It is helpful to write the gimkit code on the whiteboard in your classroom. This way, if someone arrives late or gets disconnected, they can see the numbers without having to interrupt your teaching or the other students.
Exploring the Gimkit/Live Experience
The gimkit/live experience is what sets this platform apart from a standard quiz. While the students are playing, the teacher’s screen shows a leaderboard that updates in real-time. You can see who is in first place and how much total money the class has earned. This creates a “live” atmosphere that feels like a sporting event. You can even use “Boss Mode,” where the teacher is the person everyone is trying to beat. This usually results in a lot of laughter and high engagement from every student.
During a gimkit live session, you can pause the game at any time to explain a difficult concept. If you notice that everyone is missing the same question, just hit pause and do a quick “mini-lesson.” This makes the game a powerful teaching tool rather than just a time-filler. The music and sound effects add to the energy, but you can always mute them in the host settings if the room gets too loud. It is all about finding the right balance for your specific classroom environment.
Advanced Tips for Your Gimkit Create Projects
When you are ready to move beyond the basics of how to make a gimkit, try using the “Collab” feature. This allows your students to submit their own questions to your kit. It is a fantastic way to give them ownership over their learning. You can review their questions and approve the ones that are accurate. This not only saves you time but also encourages the students to think more deeply about the material. They love seeing their own questions pop up during the actual game.
Another pro tip for when you make gimkit sets is to use high-quality images. The platform allows you to search for photos directly within the editor. Visual cues are very helpful for younger students or those who are learning a new language. You can also add “Clarity” to your questions by providing explanations for the correct answers. This means that when a student gets a question wrong, the game tells them why. It turns every mistake into a learning opportunity, which is the hallmark of a great educational tool.
Staying Safe: Addressing Gimkit Hacks
You might hear students talking about gimkit hacks or ways to get “infinite money.” Most of these are just rumors or simple browser tricks that don’t actually work. As an expert, it is good to stay aware of these trends so you can tell your students to play fairly. The creators of the site are very good at patching any real bugs that appear. If a student is caught using an exploit, you can easily remove them from the game through your host dashboard.
Instead of looking for gimkit hacks, encourage your students to use legitimate strategies. For example, buying the “Multiplier” power-up early in the game is the best way to earn more money legally. Teaching them how to play the game effectively is much better than letting them search for shortcuts. The real value of the platform is the repetition and mastery of the content. When students play the right way, they actually learn the material, which is the whole point of the exercise.
Conclusion: Start Your Journey Today
Knowing how to make a gimkit is a game-changer for any modern classroom. It transforms the way students interact with curriculum and makes studying something they actually look forward to. From the easy gimkit login to the high-energy gimkit host game sessions, every part of the platform is built for ease and fun. Start by creating a simple 10-question kit and see how your students react. You will likely find that they are more focused and motivated than ever before.
Don’t be afraid to experiment with different game modes and question styles. The gimkit dashboard gives you all the tools you need to be successful. Whether you are hosting a quick five-minute review or a full-period tournament, this tool is flexible enough to handle it all. Remember to keep your gimkit join code visible and stay engaged with the leaderboard. Your classroom will thank you for bringing this exciting technology into their daily routine!
Frequently Asked Questions (FAQs)
1. Is Gimkit free for teachers to use?
Yes, there is a free version called “Gimkit Basic.” It allows you to create kits and host games with most of the core features. There is also a “Pro” version that offers more game modes and unlimited features. Many teachers start with the free version and upgrade later if they need more variety.
2. How many students can join a single game?
In the basic version, there are limits on the number of players, but it is usually enough for a standard-sized classroom. The “Pro” version allows for much larger groups. It is perfect for hosting whole-grade competitions or large school events.
3. Can I use Gimkit for remote learning?
Absolutely! Since the game is played through a website like gimkit/live, students can play from home. You just need to share the gimkit join code with them via a video call or your learning management system. It works perfectly on tablets, laptops, and even smartphones.
4. How do I find a gimkit code for a game?
You can only get a gimkit code from a host (usually a teacher). When a teacher starts a game, a random code is generated and shown on their screen. There is no way to find a code for a game that isn’t currently being hosted by someone you know.
5. Can I import questions from Quizlet?
Yes! This is one of the best features for saving time. When you click on gimkit create, you can select the option to import from Quizlet. You just paste the link to your flashcard set, and the platform automatically turns them into game questions for you.
6. What should I do if the gimkit/join page isn’t loading?
First, check your internet connection. If the connection is fine, try refreshing the page or clearing your browser cache. Make sure you are using a modern browser like Chrome or Safari. Usually, a quick refresh fixes most issues with the join gimkit screen.